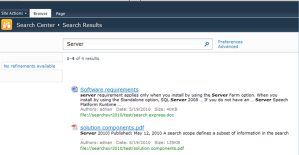
Configure PDF files support in Sharepoint.


Hi,

Out of box SharePoint search does not includes the PDF file support which means it didn’t recognize that you have uploaded a file with extension .pdf. There is very easy integration of Adobe Ifilter with SharePoint just by doing some administrative changes on SharePoint server. I am documenting the steps below:

1) Install PDF iFilter 9.0 (64 bit) from PDFiFilter64installer.zip.

2) Download PDF icon picture pdf16.gif from Adobe web site and copy to C:\Program Files\Common Files\Microsoft Shared\Web Server Extensions\14\TEMPLATE\IMAGES\

3) Navigate to Central Admin | Manage service applications | Search Service Application and once there click on “file types” to add the PDF file type.

4) Add the following entry in docIcon.xml file, which can be found at: C:\Program Files\Common Files\Microsoft Shared\Web Server Extensions\14\TEMPLATE\XML
<Mapping Key=”pdf” Value=”pdf16.gif” />

5) Open regedit.

6)Navigate to the following location:HKEY_LOCAL_MACHINE\SOFTWARE\Microsoft\Office Server\14.0\Search\Setup\ContentIndexCommon\Filters\Extension

  • Right-click > Click New > Key to create a new key for .pdf
  • Add the following GUID in the default value
    {E8978DA6-047F-4E3D-9C78-CDBE46041603}

7) Restart the SharePoint Server Search 14

8) Reboot the SharePoint servers in Farm

9) Upload any sample PDF document(s) to the document library of your site.

10) Perform FULL Crawl to get search result or Perform incremental to include PDF files.

11) Once the crawl is completed we will get search results.


Now your SharePoint will support PDF files in search content. Happy sharepointing :)..

Create and configure search for new Custom Scopes


Hi,

Concept of search scopes was introduced just to allow user to narrow the searches on the basis of the content sources, external sites and metadata properties. Scopes are the integral part of the search UI by providing user to select the desired scope using the drop down. These can also be per-configured search web parts such as search result web part.

Scopes works on the logically “And” option on user searches. Suppose if you have defined a scope for a content type then search results will be narrowed down only for specified content type. Search scopes set at the service application level are available to all sites and site collections within the service application. These scopes cannot be modified or deleted at the site administration level.

Create a Search scope:

Open up Central Administration, go to Manage Service Applications, click on your Search Service Application and then click on manage on the ribbon. This takes you to the search administration page.

On the left hand side under Queries and Results click on Scopes

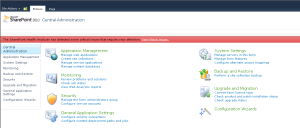
SharePoint 2010 Central Administration

Then click on New Scope, A scope is made up of a title that the user sees when choosing it from a Search Web Part. The description describes what the scope represents. This is for administrative purposes. The Target Results page gives you the ability to use the Default Results page or specify a Custom Results page. In my case, I will be creating a new scope for news content type.

You are taken back to the scopes page and you can see the new custom scope that we just created. Now we need to add the rules that make the scope work, so click on Add rules.

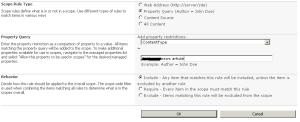
First we want to add all of the content sources that you would like to find tasks on. This allows you to not include tasks on a certain site if you would like, it also it want allows you to get tasks from another farm. You will only be able to configure this for sources that you have indexing configured. So if you are looking to find tasks on another farm you have to setup that connection to have it indexed first.

Scope Rule Types

There are four search scope rule types.

1) Web Address Rules –  This type of rule can incllude content in web sites, file shares, exchange public folders, or any other content in the search index that has a URL. These can include the following.

    1. FolderIncludes items in the folder and subfolders that pertain to the indicated path.  With SharePoint URLs you can create rules that include or exclude different elements, such  as a site or a particular folder.
    2. Host NameLimits content to a particular server name.
    3. Domain or Sub Domain – Limits content to a specific, fully qualified domain name such as contoso.com.

2)Property Query Rules – Limits content where a managed property is equal to a certain value. Only managed properties that have the “Allow this property to be used in scopes.” option checked can be used to limit content.

    1. Content Source Rules – Enables you to limit content to a particular content source. This is useful if your service application has numerous content sources and you want to limit the scope to just a SharePoint content source or more granular types of content sources such as My Sites or Team Sites.
    2. All Content Rules – Includes all content. Enables the construction of a more complicated scope that includes many rules. For example, you can combine this rule with an Exclude Content source rule. By doing so, the scope contains all content except possibly a file share content source.

Scope Rule Behaviors

Scope rule behaviors enable administrators to combine multiple rules together using simple logic. This simple logic enables administrators to create precise subsets of content. The recommended limit for the number of rules per scope is 100 or 600 per service application.

There are three types of rule behaviors:

  • Include – Any item that matches this rule is included, unless the item is excluded by another rule. Use this option to apply an “OR” rule.
  • Required – Every item in the scope must match this rule. Use this option to apply an “AND” rule.
  • Exclude – Items matching this rule are excluded from the scope. Use this option to apply an “AND NOT” rule.

If you don’t see ContentType as an option when creating this rule, go to Search Service Application –> Metadata Properties and then edit the managed property and set All this property to be used in scopes. Then repeat the steps above.

Next step is to take a long breath and relax till new scope will be ready for use.

After the waiting part we’ll get:

Configure Site to use new scope:

1) Create a search page:

Go To Search > Site Actions > All Site Content > Pages.

Open the pages library and from the ribbon click on document and then click on New Document > Page.

Select the “(Welcome Page)Search box” option

Fill in all the necessary field and click on Create. DON’T FORGET TO CHECK IN YOUR PAGE.

2) Create a search result page: Go To Search > Site Actions > All Site Content > Pages > Add New Page

In this step we’ll create a search result page.

Fill in all the necessary field and click on Create. DON’T FORGET TO CHECK IN YOUR PAGE.

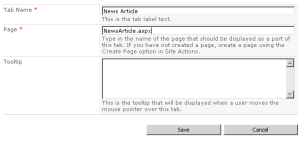
3) Create a search page tab:Go To Search > Site Actions > All Site Content > Tabs in Search Page > Add New Item

In this step we’ll add a tab in our search linked to the search page.

Fill in all the necessary field and click on Save.

4) Create a search result page tab: Go To Search > Site Actions > All Site Content > Tabs in Search Results> Add New Item

In this step we’ll add a tab in our search results linked to the search result page.


Fill in all the necessary field and click on Save.

Let’s look in our search.

Nice, but it doesn’t work yet. We haven’t linked our scope to our results yet.

5) Adding Search to Search Results.

  • Go to correct search page(NewsArticle.aspx) and edit page.
  • Do and edit webpart on the search box.
  • Change the result page under Miscellaneous and click OK.
  • Save page and DON’T FORGET TO CHECK IN

Adding the scope to the search results.

  • Go to the search result pages and edit page
  • Edit webpart on the Search Core Results
  • Change the scope under Location and click OK.
  • Save page and DON’T FORGET TO CHECK IN

and done.

You will see that if you do a deeper search starting from the results pages, he will search in ALL Sites instead of Base. Change the resultpage for the search box on the result pages  and that will be fixed also.

Happy SharePoint Searching…

Configuring Enterprise search site


Hi,

In my few previous post, I described how search service application has been created and configured. But just creating a service application doesn’t solve our purpose. We must have some page or site where user can use this application to perform search. SharePoint has some built in site templates(Enterprise search) to use search application features. In this post I will explain how one can create search site by performing simple steps.

As per the project infrastructure, we can either create a separate web application for search  but I will create search site collection under the same web application where default SharePoint site is configured.

Creating an “Enterprise search center” site:

Navigate to Central Administration > Application Management > Site Collections, then click on Create site collections.

Ensure you are creating the Site Collection below the relevant Web Application.

Enter your Title, Description etc and select the Enterprise Tab under Template selection.  Select the Enterprise Search Center, specify your site collection administrators and click OK.

This will create a basic search site collection as shown below:

If you have already completed full crawl from the search service application, you can now perform searches just for testing purpose. Also you can perform the people search.

Issues 1: This item and all items under it will not be crawled because the owner has set the NoCrawl flag to prevent it from being searchable

Resolution:

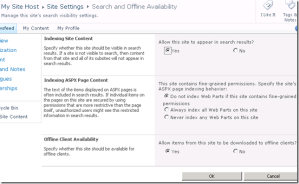
In the site collection settings under the “Site Administration” setting, there’s an option called “Search and offline availability” which contains a switch that seems to be disabled by default for certain templates (eg for the “Blank” site template, “Search Centre” or “My Sites”). If you are getting messages in the Unified Logging Service on the SharePoint Servers that looks like “This item and all items under it will not be crawled because the owner has set the NoCrawl flag to prevent it from being searchable”, then go into Site Settings –> Site Administration –> “Availability of search and work offline” for the site in question and set the “Indexing Site Content” switch to “Yes”.

Easy to fix, hard to find – all of the other search controls for a site collection are located under the “Site Collection Administration” setting, but this one – and ONLY this one – is tucked away under “Site Administration”.

Issues 2: People search is not working.

Resolution: Make sure that your search crawler administrator account must have adequate permissions on User profile service to search for people.

Navigate to “Search service application” home page. Under system settings find the value of “Default content access account” which will be search crawl admin account.

Now navigate to the “User profile service application” under “Manage Service application” option. Simple click once on the application name so that its shown selected. Now Click on “Administrators” from the top ribbon.

In new dialog box, make sure search crawl administrator account has been added, if not simple add it and also make sure that it have rights to “Retrieve People Data for Search Crawlers”.
Configure search time-out settings

To configure search time-out settings

  1. Verify that the user account that is performing this procedure is an administrator for the search service application.
  2. In Central Administration, in the Quick Launch, click General Application Settings.
  3. On the General Application Settings page, in the Search section, click Farm Search Administration.
  4. On the Farm Search Administration page, in the Farm-Level Search Settings section, click the value of the Time-out (seconds) setting.
  5. In the Search Time-out Setting dialog box, in the Connection time (in seconds) box, type the number of seconds that you want the search system to wait when attempting to connect to a content repository.
  6. In the Request acknowledgement time (in seconds) box, type the number of seconds that you want the search system to wait for a content repository to respond to a connection attempt.
  7. Click OK.

Configure external site as content sources in sharepoint search


Hi,

In my previous post(Creating and configuring Search service application) I explained how to configure the search service application and its configuration. We can also search the external sites content using the SharePoint search just by creating new content source. Follow the given steps to create the new content source for external site.

To get to the Manage Content Sources page

  1. Verify that the user account that is performing this procedure is a service application administrator for the Search service application.
  2. On the Home page of the SharePoint Central Administration Web site, in the Application Management section, click Manage service applications.
  3. On the Manage Service Applications page, click Search Service Application.
  4. On the Search Administration Page, in the Crawling section, click Content Sources.


After clicking on the link you will be redirected to the page where all the available content sources are displayed.


To create a content source

  1. On the Manage Content Sources page, click New Content Source.
  2. On the Add Content Source page, in the Name section, in the Name box, type a name for the new content source as “External Sites”.
  3. In the Content Source Type section, select the “Web Sites”.
  4. In the Start Addresses section, in the Type start addresses below (one per line) box, type the URLs from which the crawler should begin crawling. For example: http://example.internetsite.com
  5. In the Crawl Settings section, select “Only crawl within the server of each start address”.
  6. In the Crawl Schedules section, to specify a schedule for full crawls, select a defined schedule from the Full Crawl list. A full crawl crawls all content that is specified by the content source, regardless of whether the content has changed. To define a full crawl schedule, click Create schedule.
  7. To specify a schedule for incremental crawls, select a defined schedule from the Incremental Crawl list. An incremental crawl crawls content that is specified by the content source that has changed since the last crawl. To define a schedule, click Create schedule.You can change a defined schedule by clicking Edit schedule.
  8. To prioritize this content source, in the Content Source Priority section, on the Priority list, select Normal or High.
  9. To immediately begin a full crawl, in the Start Full Crawl section, select the Start full crawl of this content source check box, and then click OK.


This finishes creation of the new content source for external sites. But not all the internet facing sites allows anonymous access to its content. So there must be some place where we can configure the rules for the Urls which allows us to enter the credentials to access the content of site while crowing.

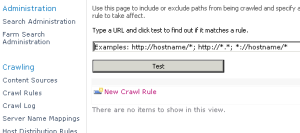
So navigate to Search Service Application > Crawl rules.

Click on the option “New Crawl Rule”


Path: Mention the internet site Url under the path section.

Crawl configuration: Select the “Include all items in this path” option.

Specify Authentication: Select “Specify a different content access account”. Enter the site credentials.


Click Ok.

Next and last step is to crawl the content source “External Sites”. This will allow SharePoint can crawl the external site content.

Happy SharePointing 🙂

Creating and configuring Search service application


SP 2010 provides all the basic search functionalists like MOSS 2007 search was providing. Along with default features it also facilitates end user with few interesting features. With batter enhancements in search query, new search model enables end users to create and run more effective search queries. It also enables users to search the enterprise from the Windows 7 desktop. Below are few new features listed:

  • Boolean query syntax for free-text queries and for property queries
  • Prefix matching for search keywords and document properties
  • Suggestions while typing search queries
  • Suggestions after users run queries
  • Federated search connectors for searching the enterprise from Windows 7

Search results are also restructured to use refinement panel, improved in people search area, enhanced to display and filter only relevant results.

In this post, I will start explaining from scratch to create/configure search service application and later on we discuss how we can configure custom scopes in enterprise search site.

Creating Search service application:

Verify that the user account that is performing this procedure is a member of the Farm Administrators group for the farm for which you want to create the service application.

On the Central Administration Home page, in the Application Management section, click Manage service applications.

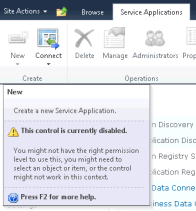
On the Manage Service Applications page, on the ribbon, click New, and then click Search Service Application. If New link is not clickable then you must open the browser with option “Run as administrator”.
         

On the Create New Search Service Application page, accept the default value for Name, or type in a new name for the Search service application.

Name: Enter a name for your Service Application.                                                  

FAST Service Application: Select “None”

Search Service Account: Click on Register new managed account and ensure your domain account has already been provisioned in Active Directory.  I have created a separate search account; e.g. DOMAIN\sp_search.

In the Application Pool for Search Admin Web Servicesection, do the following:

Select the Create new application pool option, and then type a name for the application pool in the Application pool name text box.

In the Select a security account for this application pool section, select the Configurable option, and then select the account that you created to run the application pool for the Search Admin Web Service from the list.

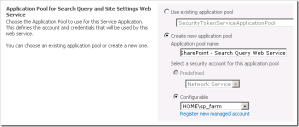
In the Application Pool for Search Query and Site Settings Web Servicesection, do the following:

Choose the Create new application pool option, and then type a name for the application pool in the Application pool name text box.

In the Select a security account for this application pool section, select the Configurable option, and then select the account that you created to run the application pool for the Search Query and Site Settings Web Service from the list.
Click OK.

After the Search service application has been created, the next step is to configure it.

Configure the Search service application

Open SharePoint 2010 Central Administration.

Select Managed service applications under Application Management.

On the Services Applications page, select the Search Service Application
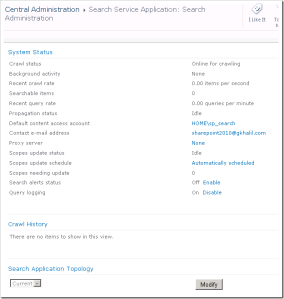
You configure a Search service application on the Search Administration page for that service application. Use the following procedure to navigate to the Search Administration page for a particular Search service application.

On the Search Administration page, configure the following settings as described in the following sections:

  • Default content access account
  • Contact email address
  • Content sources

Use the following procedure to specify the default content access account.

To specify the default content access account

  1. On the Search Administration page, in the System Status section, click the link in the Default content access account row.
  2. In the Default Content Access Account dialog box, in the Account box, type the account that you created for content access in the form domain\user name.
  3. Type the password for this account in the Password and Confirm Password box
  4. Click OK.

To specify the contact e-mail address

On the Search Administration page, in the System Status section, click the link for the Contact e-mail address.

  1. In the Search Email Setting dialog box, in the E-mail Address box, type the e-mail address that you want to appear in the logs of servers that are crawled by the search system.
  2. Click OK.                                                             

Configuring content sources:
Crawling requires at least one content source. A content source called Local SharePoint sites is created automatically during installation and is automatically configured for crawling all of the SharePoint sites in the server farm.

On the Search Administration Page, in the Crawling section, click Content Sources.

As was the case with SharePoint 2007, our Local SharePoint sites will be detected by default, albeit without a crawl schedule.

Check to see that your Start Addresses are located within your content source via editing the content source from the drop down menu.  These includes all SharePoint Web Applications and the sps3 “User Profiles” address.
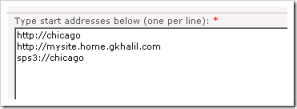

You can easily create your crawl schedule by clicking on Local SharePoint sites and scrolling down to Crawl Schedules.

Once your crawl has completed, you should confirm that there were no errors encountered during the initial crawl.  Usually any errors noted are most likely due to incorrect permission assignments.

For more information, see Add, edit, or delete a content source (SharePoint Server 2010).

Also if one needs to configure the external content sources then have a look on the post Configuring external content sources.

Other confrontational settings:

Confirming Permissions

In order to perform the people search, it is required that newly configured search application administrator must have permissions on the user profile service application. Select Managed service applications under Application Management.

Click on User Profiles service. Just highlight the User Profiles and select Administrators from the ribbon.
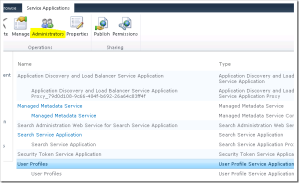
Our newly provisioned search account should have “Retrieve People Data for Search Crawlers” selected as a permission.

We will also confirm that our sp_search account has the necessary “Read” permissions against the Web Applications being crawled.

Navigate to Central Administration > Application Management > Manage Web Applications.  Again, highlight the Web Application in question and from the ribbon select User Policy.

Ensure that the Search Crawling Account is set to the sp_search domain account.

With this step, search application is now fully configured. In the next blog I will describe how to create the enterprise search site to consume this application for displaying the results. Also we will see how we can create some custom scopes.

Thanks for your time :)..